Last Stand Hill
|
Minneconjou Ford
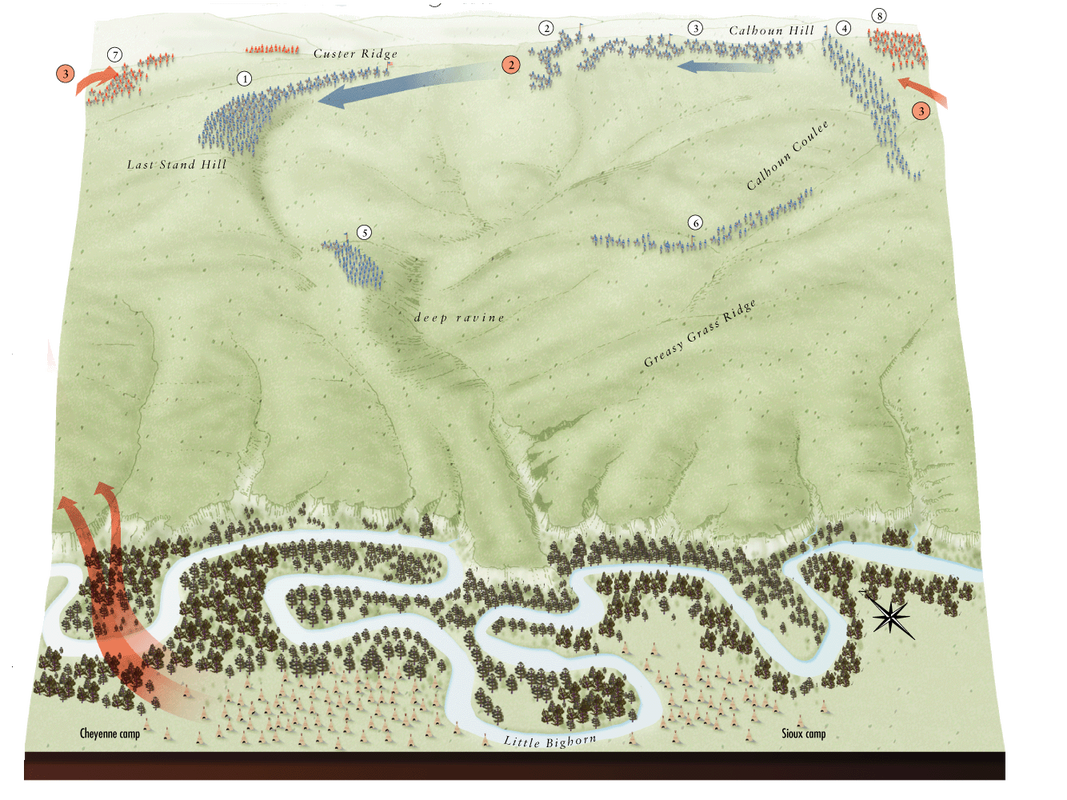
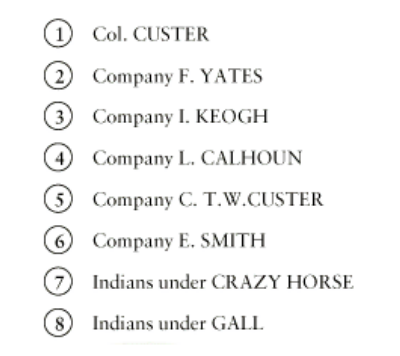
After his second attempt to cross the Little Bighorn River, Custer's roughly 210 troops were trapped in Minneconjou Ford, a series of ridges, bluffs, and ravines north of the Indian encampment. The Indians then performed the "hammer and anvil" maneuver on Custer's position. Warriors on foot, from both the village and returning from Reno's advance, attacked Custer from the south and east. Mounted Indians under Crazy Horse then attacked Custer from the north. Companies I and L on the eastern side were immediately run over by Gall, a Lakota war commander, staging their own individual "last stand". Company C was trapped in the Deep Ravine, with only half the company reuniting with Custer on Last Stand Hill. Battered Companies E and F also reached Last Stand Hill, but had little effect on the inevitable outcome of the battle. (Click to Enlarge)
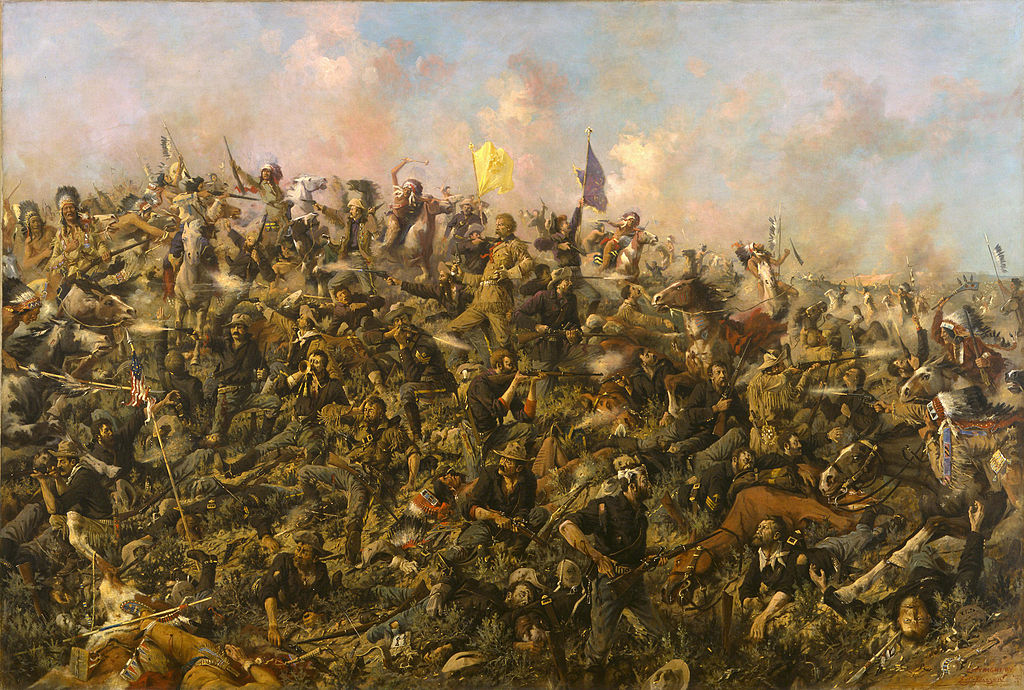
The Last Stand Custer's force was annihilated after thirty minutes of fierce fighting atop Last Stand Hill. Archaeological evidence points to two theories of Custer's final demise. The traditional last stand theory points to Custer's squadron being split up into three sections, that were unable to reunite during the battle. Custer would have also set up skirmish lines, that were eventually overwhelmed by the massive numbers of Indians converging on Custer. The other theory is that near the end of the battle, a small group of twenty-eight soldiers tried to escape from Last Stand Hill, but ended up in the Deep Ravine. |
The geography of and around Last Stand Hill prevented Custer's escape or support, and while being tactically advantageous, secured his eventual defeat.
Geography of Minneconjou Ford
Last Stand Hill was the iconic hill where Custer made his last stand. It was a strategical high point above Minneconjou Ford, where Custer was able to stage a brutal defense. Southeast of Last Stand Hill is the Deep Ravine, a deep, narrow valley worn by running water. The Deep Ravine played a large role in trapping some elements of Custer's army. Last Stand Hill also included Custer's Ridge. Custer's Ridge placed Custer and his men above the attackers from the north. Calhoun Coulee was another high point to the east, and was defended by Company L before they were run over by Gall's troops. (Click to Enlarge)
Direct Effect of Geography Even though Last Stand Hill made for a dogged defense by Custer, it ultimately condemned him to his death. Fighting from the high point gave Custer a tactical advantage, allowing his troops to momentarily keep the larger Indian forces at bay. Also, the surrounding hills and valleys made it difficult for the Indians to present an organized and coordinated attack. But as much as the rugged terrain supported Custer in his final hours, it sealed his catastrophic fate as well. Just as the nearby ridges and valleys hampered the Indian advance, they prevented any means of escape by Custer, stranded on a hill and forced to make his last stand. |


Last Stand Hill